Welcome to the world of sanding belts, the unsung heroes of the hardware universe. These versatile tools might not get the same attention as power drills or shiny wrenches, but they play a pivotal role in shaping, smoothing, and perfecting countless DIY and professional projects. Whether you’re a seasoned woodworker, a metal artisan, or a weekend hobbyist, sanding belts are indispensable in your toolkit.
What Are Sanding Belts?
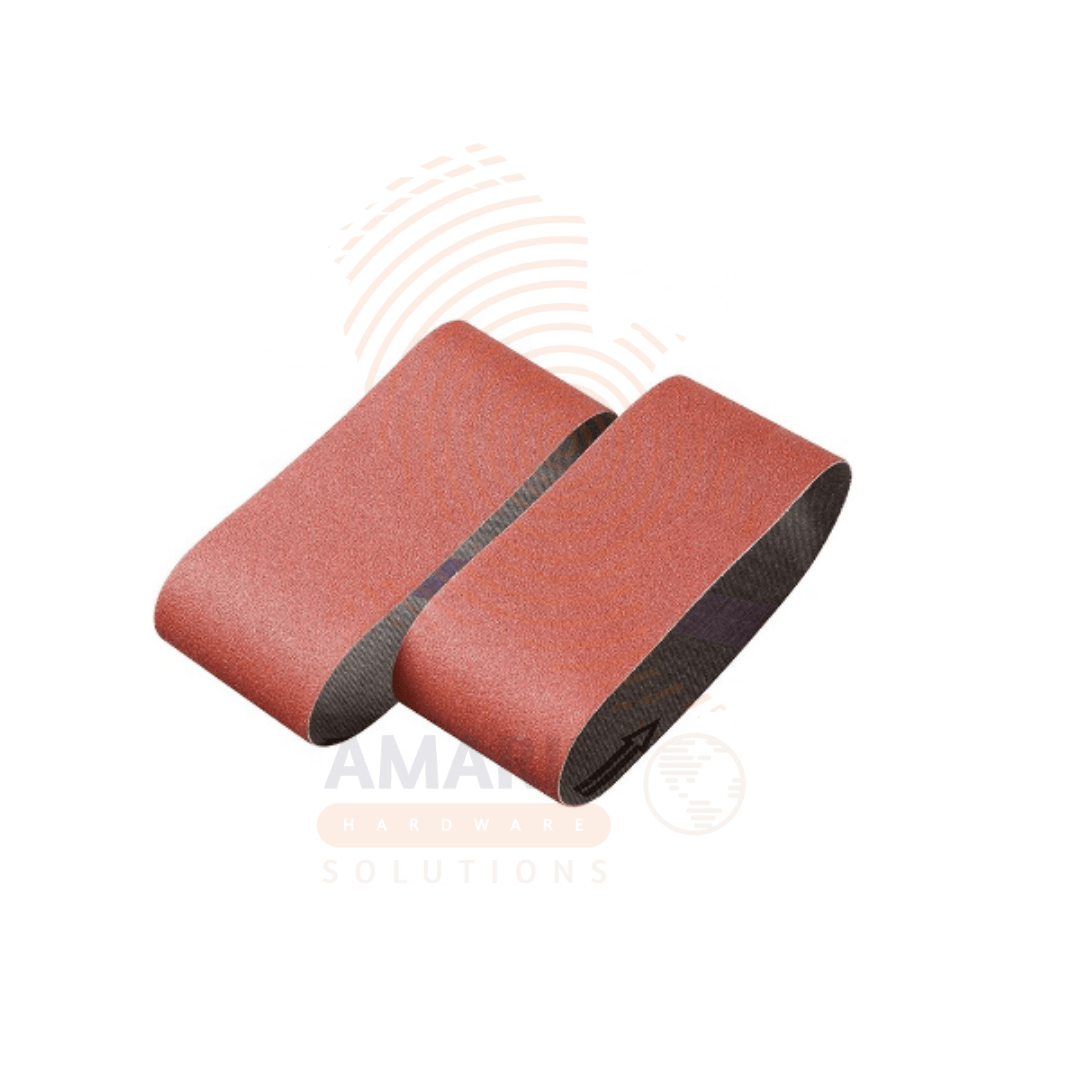
Sanding belts are essentially continuous loops of abrasive material that fit onto belt sanders. They come in various sizes, grits, and materials, each designed for specific tasks. The key components of a sanding belt include the abrasive grains, the backing material, and the bond that holds the grains together.
The Grit Factor
Grit is the term used to describe the size of the abrasive particles on the sanding belt. The lower the number, the coarser the grit. Here’s a quick rundown:
- Coarse Grit (40-60): Ideal for heavy material removal, such as stripping paint or smoothing rough wood.
- Medium Grit (80-120): Perfect for general sanding tasks, including surface preparation and initial smoothing.
- Fine Grit (150-220): Best for finishing touches, creating a smooth, polished surface.
Types of Sanding Belts
- Aluminum Oxide Belts: The most common type, known for durability and versatility. Suitable for wood, metal, and plastic.
- Zirconia Alumina Belts: More robust and longer-lasting than aluminum oxide, ideal for heavy-duty grinding and cutting.
- Ceramic Belts: High-performance belts that stay sharp longer, perfect for tough materials and demanding applications.
- Silicon Carbide Belts: Best for sanding hard materials like glass, stone, and metal.
A Day in the Life of a Sanding Belt
Imagine a piece of rough-sawn wood, freshly cut and full of splinters. It’s destined to become a beautiful piece of furniture, but first, it needs the touch of a sanding belt. You start with a coarse grit to remove the rough edges and surface imperfections. The belt hums along, transforming the rough wood into a smoother surface with each pass.
Next, you switch to a medium grit belt. The wood begins to take on a more refined look. The belt moves effortlessly, smoothing out the marks left by the coarse grit. You can see the grain of the wood emerging, revealing its unique character.
Finally, it’s time for the fine grit belt. This is where the magic happens. The wood becomes silky to the touch, with a sheen that hints at the beautiful finish to come. The sanding belt has done its job, turning a rough piece of lumber into a work of art.
Tips and Tricks for Using Sanding Belts
- Choose the Right Grit: Start with a coarse grit for heavy removal, then move to finer grits for finishing.
- Keep It Clean: Use a sanding belt cleaner to remove built-up resin and dust, extending the life of your belt.
- Avoid Overheating: Excessive heat can damage both the belt and the material. Take breaks and use light pressure.
- Check for Wear: Inspect your belts regularly for signs of wear and tear. A worn belt won’t perform effectively.
The Unsung Hero
While they might not be as flashy as some other tools, sanding belts are the unsung heroes that bring out the beauty in materials. They smooth out imperfections, highlight natural grains, and prepare surfaces for finishing. In the hands of a skilled craftsman, a sanding belt is a ticket to perfection.
So next time you’re in your workshop, take a moment to appreciate your sanding belts. These humble loops of abrasive material are essential for turning rough beginnings into polished masterpieces. Whether you’re crafting a fine piece of furniture, restoring a classic car, or creating a stunning metal sculpture, sanding belts are your trusty sidekick on the journey from rough to refined.






Add comment