
 Acrylic Sealants
 Construction Adhesives
 Double-Sided Tape
 Duct Tape
 Electrical Tape
 Epoxy & Resins
 Silicone Sealants
 Masking Tape
 Automotive Wrenches & Socket Sets
 Battery Chargers & Jump Starters
 Car Jacks & Stands
 Car Wash & Detailing Products
 Diagnostic Tools
 Tire Inflators
 Vehicle Lighting
 Oil & Lubricants
 Adhesives & Sealants
 Bricks & Blocks
 Cement & Concrete
 Drywall & Plaster
 Flooring (Tiles, Wood, Laminate)
 Lumber & Plywood
 Paints, Primers & Coatings
 Insulation Materials
 Roofing Materials
 Circuit Breakers
 Electrical Cables & Wires
 Switches & Sockets
 Fuses & Relays
 Connectors & Terminals
 Electrical Boxes & Panels
 Conduit & Fittings
 Lighting Fixtures & Bulbs
 Extension Cords & Power Strips
 Anchors
 Bolts
Bolts Clips & Clamps
 Screws
 Nuts
Nuts Washers
 Rivets
 Nails
Nails Threaded Rods
 Hammers
 Measuring Tools (Tapes, Levels, Calipers)
 Screwdrivers
 Pliers & Cutters
 Saws & Blades
 Chisels & Punches
 Allen Keys & Hex Keys
 Ratchets & Socket Sets
 Wrenches & Spanners
 Power Tool Accessories (Blades, Bits, Discs)
 Rotary Tools
 Saws (Circular, Jigsaw, Reciprocating)
 Drills & Drivers
 Grinders & Sanders
 Heat Guns
 Nail Guns
 Impact Wrenches
 Batteries & Chargers
 Pipes & Fittings (PVC, Copper, PEX)
 Plumbing Tools
 Pumps & Motors
 Sealants & Adhesives for Plumbing
 Valves & Taps
 Water Heaters
 Drainage Systems
 Faucets & Fixtures
 Hoses & Tubing
 Hinges & Latches
 Hooks & Brackets
 Window Hardware
 Chains & Cables
 Casters & Wheels
 Shelving & Storage Systems
 Door Handles & Locks
 Drawer Slides & Cabinet Hardware
 Personal Protective Equipment (PPE)
 Respirators & Masks
 Safety Glasses
 Safes
Safes Security Cameras
 Gloves
 Helmets
 Ear Protection
 Fire Safety Equipment
 Locks & Padlocks
 Motion Sensors & Alarms
 Garden Fencing
 Garden Furniture Hardware
 Lawn Mowers
 Trimmers & Edgers
 Shovels & Spades
 Rakes & Hoes
 Pruning Shears & Loppers
 Watering Systems (Hoses, Sprinklers, Nozzles)
 Interior Paints
 Paint Brushes & Rollers
 Paint Strippers & Thinners
 Paint Trays & Accessories
 Exterior Paints
 Spray Paints
 Primers & Undercoats
 Varnishes & Stains
 Gaskets & Seals
 Hydraulic Fittings
 Industrial Fasteners
 Industrial Hoses
 Lubricants & Greases
 Metal Sheets & Bars
 Bearings & Bushings
 Belts & Pulleys
 HVAC Filters
 Insulation for HVAC
 Air Conditioners
 Refrigerants
 Ventilation Ducts & Fittings
 Thermostats & Controllers
 Fans & Blowers
 Pegboards & Hooks
 Shelving Units
 Storage Bins & Containers
 Toolboxes & Tool Chests
 Workbenches
 Drawer Organizers
 Labeling Supplies
 Welding Accessories (Clamps, Brushes)
 Welding Electrodes & Rods
 Welding Helmets & Gloves
 Welding Machines
 Soldering Irons & Stations
 Flux & Solder Wire
 Generator Accessories
 Inverters
 Portable Generators
 Power Inverters
 Transfer Switches
 Diesel & Gasoline Generators
 Transport Equipment: Carts, Dollies, and Hand Trucks
 Storage Solutions: Pallets, Racks, and Containers
 Lifting Equipment: Hoists, Cranes, and Jacks
 Conveyors & Accessories: Belts & Rollers
 Office Chairs
-5%


Flat Head Hex Wrench Set - Short
Original price was: $ 15.50.$ 14.73Current price is: $ 14.73.

Folding Hex Wrench Set
Original price was: $ 14.92.$ 14.17Current price is: $ 14.17.
Electric Router
Original price was: $ 82.69.$ 78.56Current price is: $ 78.56.
WhatsApp Order
An electric router is a power tool used in woodworking and carpentry for hollowing out an area or creating a specific profile on the edge of a material, typically wood. It operates by spinning a cutting tool or bit at high speeds, allowing for precise and controlled removal of material. Electric routers are versatile tools and can be equipped with various bits to perform tasks such as shaping, grooving, trimming, and forming decorative edges. They are widely employed in both professional and DIY settings for tasks that require accurate and intricate detailing in woodworking projects.
Description
Electric Router
Uses
-
Edge Profiling: Routers are frequently used to shape and create decorative profiles on the edges of wood boards. This is often done for aesthetic purposes or to match existing profiles in furniture or cabinetry.
-
Router Tables: Routers can be mounted on router tables, allowing for greater precision and control. This setup is commonly used for tasks like molding, dadoing, and jointing.
-
Hollowing Out Areas: Routers are excellent for hollowing out areas in wood, such as creating recesses for inlays or carving out spaces for electrical components in woodworking projects.
-
Joinery: Routers are widely employed in creating joints like dovetails, mortises, tendons, and rabbets. They can be equipped with specialized bits for these tasks, making them crucial for joinery work.
-
Fluting and Grooving: Routers are used to create flutes, grooves, or channels in wood, often for decorative or functional purposes. This can include making channels for hardware or adding design elements to the surface.
-
Template Routing: Routers are utilized with templates to replicate specific shapes or patterns accurately. This is common in creating identical pieces for production or in crafting intricate designs.
-
Trimming and Flush Cutting: Routers can be equipped with flush trim bits to trim edges or surfaces flush with adjoining materials. This is useful for achieving a clean and uniform finish.
-
Sign Making: Routers are often employed in sign making to carve letters and designs into wood, plastic, or other materials.
-
Inlay Work: Routers are used to create precise pockets for inlaying materials such as metal, wood, or plastic into the surface of a larger workpiece.
-
Plunge Routing: Some routers are designed for plunge routing, allowing the bit to be lowered into the material while the router is in operation. This is useful for tasks like creating stopped grooves and mortises.
SAFETY HANDLING PRECAUTIONS
Safety Precautions
-
Read the User Manual:
-
Familiarize yourself with the user manual provided by the manufacturer. It contains important information on the router's specifications, recommended usage, and safety guidelines.
-
-
Wear Personal Protective Equipment (PPE):
-
Always wear appropriate personal protective equipment, including safety glasses or goggles to protect your eyes from flying debris, and hearing protection if the router is loud.
-
-
Dust Collection:
-
Use a dust collection system or wear a dust mask to minimize inhalation of dust and debris generated during routing. Wood dust can be harmful if inhaled.
-
-
Secure Workpiece:
-
Ensure that the workpiece is securely fastened or clamped to prevent it from moving during operation. Unstable work pieces can lead to accidents.
-
-
Router Bit Selection:
-
Choose the correct router bit for the task at hand, and ensure that it is sharp and in good condition. Dull or damaged bits can cause kickback or produce poor results.
-
-
Depth Adjustment:
-
Set the router's cutting depth before starting the operation. Avoid adjusting the depth while the router is running.
-
-
Power Off When Changing Bits:
-
Always disconnect the power source or turn off the router when changing bits. Ensure that the router is completely stopped before making any adjustments.
-
-
Two-Hand Operation:
-
When possible, use both hands to operate the router. This provides better control and stability.
-
-
Start Away from the Material:
-
Start the router away from the material and move it into the workpiece gradually. This helps prevent kickback and ensures a smoother cut.
-
-
Router Speed:
-
Adjust the router speed based on the type of material and the size of the router bit being used. High speeds may be suitable for smaller bits, while larger bits may require lower speeds.
-
-
Router Orientation:
-
Be mindful of the router's orientation and the direction of rotation. Ensure that the cutting edge is moving against the rotation for proper cutting action.
-
-
Disconnect Power During Breaks:
-
When taking breaks or making adjustments, disconnect the power source to prevent accidental starts.
-
-
Keep Hands Clear:
-
Keep your hands and other body parts away from the router bit during operation. Use push sticks or other accessories to guide the workpiece.
-
-
Work in a Well-Lit Area:
-
Ensure that the work area is well-lit to enhance visibility and reduce the risk of errors.
-
-
Training and Supervision:
-
If you are new to using a router, seek proper training or supervision from an experienced user. Learn and practice using the tool in a controlled environment.
-
Related products

Bi-Metal Hole Saw Set
A Bi-Metal Hole Saw Set refers to a collection of nine hole saws, each constructed with a bi-metal design. A hole saw is a cylindrical cutting tool used to create holes in various materials such as wood, metal, plastic, and more. The term "bi-metal" indicates that the hole saws are made from two different types of metals, typically high-speed steel (HSS) and a more durable alloy like cobalt. This combination enhances the hole saw's cutting performance, making it suitable for a wide range of applications and providing increased durability and longevity. The set typically includes hole saws of different sizes to accommodate various hole diameters, making it a versatile tool for professionals and DIY enthusiasts alike.

Big Battery Pro
A " Big Battery Pro" typically refers to a rechargeable lithium-ion battery with a nominal voltage of 20 volts. The nominal voltage represents the average voltage output over the majority of the battery's discharge cycle. It's important to note that the actual voltage during use may fluctuate within a specified range.
These batteries are commonly used to power various devices, including power tools, garden equipment, and other portable electronic devices. The "20V" designation is a standardized measure indicating the electrical potential of the battery, providing a general indication of its power output.
Keep in mind that when considering a 20V battery, it's essential to verify compatibility with the specific device or tool it is intended for. Additionally, different manufacturers may have variations in the actual voltage, capacity, and features of their 20V battery products. Checking the product documentation or contacting the manufacturer for detailed specifications is recommended for accurate information.
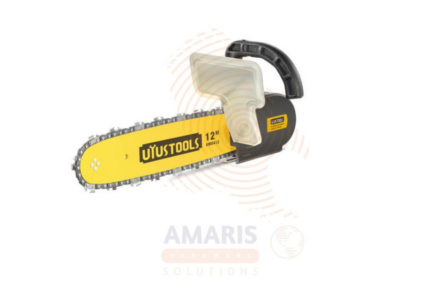
Chain Saw Adapter for Angle Grinder
Chain Saw Adapter for Angle Grinder typically refer to components that allow you to attach or use certain accessories with your chainsaw or grinder.
- Chainsaw Adapter:
- A device that enables the use of a 12-inch chainsaw blade on a chainsaw designed for a different blade size. This adapter allows you to customize or replace the original chainsaw blade with a 12-inch one, potentially for different cutting applications.
- Grinder Adapter:
- An accessory that allows you to attach a grinder to a 12-inch chainsaw, converting it into a chainsaw chain sharpener. This adapter facilitates the grinding or sharpening of the chainsaw chain, ensuring optimal cutting performance.
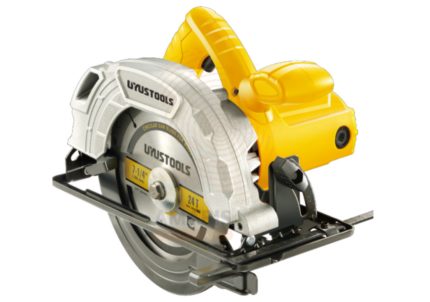
Circular Saw
A circular saw is a power tool equipped with a rotating circular blade, typically with teeth along its edge, designed for cutting various materials such as wood, plastic, metal, or masonry. It is commonly used in carpentry, construction, and other applications to make straight or beveled cuts with precision and efficiency. The circular saw is versatile and can be handheld or mounted on a table or other stationary surface, depending on the specific model and intended use.

Double – End Bits Set
A Double - End Bits Set typically refers to a collection of interchangeable tool bits designed for use with screwdrivers, power drills, or similar tools. Each bit in the set has two distinct ends with different types or sizes of tips, allowing the user to perform various tasks without needing multiple individual bits. These sets often include a variety of common bit types, such as Phillips, slotted, Torx, or hex, providing versatility for different screw and fastener types. The double-ended design allows users to flip the bit and switch between different tips easily, making it a convenient and space-saving solution for various applications.
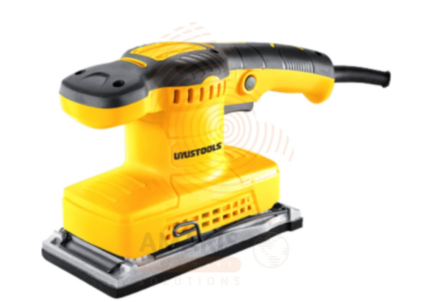
Finishing Sander
The finishing sander is a high-performance power tool designed to deliver smooth, even surfaces on wood, metal, or painted materials. Its ergonomic design allows for comfortable handling during extended use, while its powerful motor ensures consistent sanding performance. Perfect for removing minor imperfections, preparing surfaces for paint or varnish, and achieving a professional-quality finish, this tool is ideal for carpenters, woodworkers, DIY enthusiasts, and home improvement projects. The finishing sander is compatible with a variety of sanding pads and accessories, making it versatile for different applications and finishing requirements.

Forstner Bit Set
A Forstner bit set typically refers to a collection of five Forstner drill bits designed for woodworking applications. Forstner bits are specialized cutting tools used to bore flat-bottomed holes with clean and precise edges in wood. The set usually includes five bits with varying diameters, allowing users to choose the appropriate size for different projects. These bits often feature a center point for accurate positioning, two sharp outer cutting edges, and a cylindrical shape. The set is versatile and suitable for tasks like drilling holes for dowels, creating pocket holes, or countersinking screws in woodworking projects.

Glass Drill Set Hexagonal Handle
A Glass Drill Set Hexagonal Handle typically refers to a collection of five drill bits specifically designed for drilling holes in glass surfaces. The term "hexagonal handle" indicates that the shank of each drill bit has a hexagonal (six-sided) shape, which can provide a better grip and prevent slipping when used with a compatible drill. These drill bits are specifically crafted for working with glass materials, offering precision and minimizing the risk of cracking or damaging the glass during the drilling process. The set may include different-sized bits to accommodate various hole diameters.